Skirting, Cornices & Door frames using Bevel Profile

Door frame, skirting & cornice using Bevel Profile
[include]adsense-main.php[/include]
Here we will take a look at a quick and easy way to add skirting, cornices and door surrounds in 3D Studio Max using the Bevel Profile modifier.

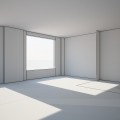
As this is a tutorial I will just make a simple wall to work with. I’ll start by drawing a quick plane. I know its not necessary but here is a picture of the plane.

Draw a plane
Now we need a wall, so using the line tool I’ll draw a line around the plane to build a wall the same way I would if I were building an interior. Cue picture of wall spline.

Draw a simple wall
Here it is after adding an extrude modifier.

Extrude the simple wall
For the the skirting I will be using the Bevel Profile modifier so I drew a line with 3D snap turned on checking that that I have it set to snap to vertex, not forgetting to miss out the door way. I would normally draw the line with the extrude modifier turned off when drawing the skirting spline so that it sits at the bottom of the wall, but so you can see where the line is I did it afterwards. You can see it here in red. For the cornice turn the extrude modifier on so that it sits at the top of the wall.

Draw a skirting spline
Now for the profile of the skirting. I drew this in Adobe Illustrator but you can just as easily draw it using the line and fillet tools. The one thing you must take note of is the little white vertex in the corner as this is the vertex that will attach to the spline we just drew.

A skirting profile
The white vertex is set by selecting the vertex then go down the modifier list and select Make First.
Now select the skirting line we drew around the wall and add a Bevel Profile modifier, click Pick Profile and select the skirting profile.
Now there is a good chance the skirting will be pointing in to the wall, if so select the Profile Gizmo in the modifier and rotate it with Angle Snap Toggle turned on to restrict the degrees. Also you can use the Scale tool on the Gizmo if you drew the profile the wrong size. As there are holes in the skirting at the door add a Cap Holes modifier to seal them up.

Add Bevel Profile
That’s it, very simple, very quick and it flows around all the corners concave and convex with a nice sharp corner. If you add a wall or a door somewhere later just amend the spline you added the Bevel Profile to and everything changes.
It is a good idea to have a folder with a selection of saved profiles you can quickly import, just go on Google and download pictures of profiles from online skirting stores and trace them.
You can use this for lots of obvious things like the skirting and cornices, but I also use it for door surrounds and windows.
I hope this tutorial has been helpful if you have any queries please leave a comment.
Screen cap of 3D Studio Max making Skirting, Coving & Door frames using Bevel Profile
1 – Building the Walls
2 – The Door-frame
3- The Skirting
4- The Coving
5- Rendering the scene
[include]adsense.php[/include]