Ambient Occlusion in 3D Studio Max
There are two reasons to use ambient occlusion passes. One is a way of adding shading into the corners of scene rendered in 3D Studio Max. The second is to check all your objects have their normals set correctly which will affect translucency and reflections.
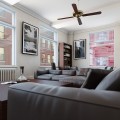
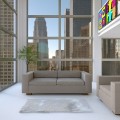
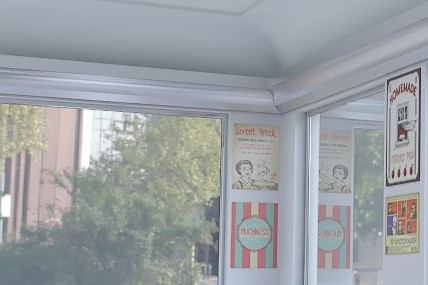
The picture below shows the original render, if you hover your cursor over the image you will see the same render with the ambient occlusion pass added in Photoshop. What this has done is add details back in to the ceiling, where the floor meets the wall on the left of the picture, the windows and the seams on the seats. It’s subtle, but it gives the image more depth. Just as a note transparent objects will be perceived as solid so it is a good idea to temporally hide the windows.
Hover over the picture to see the difference with ambient occlusion added
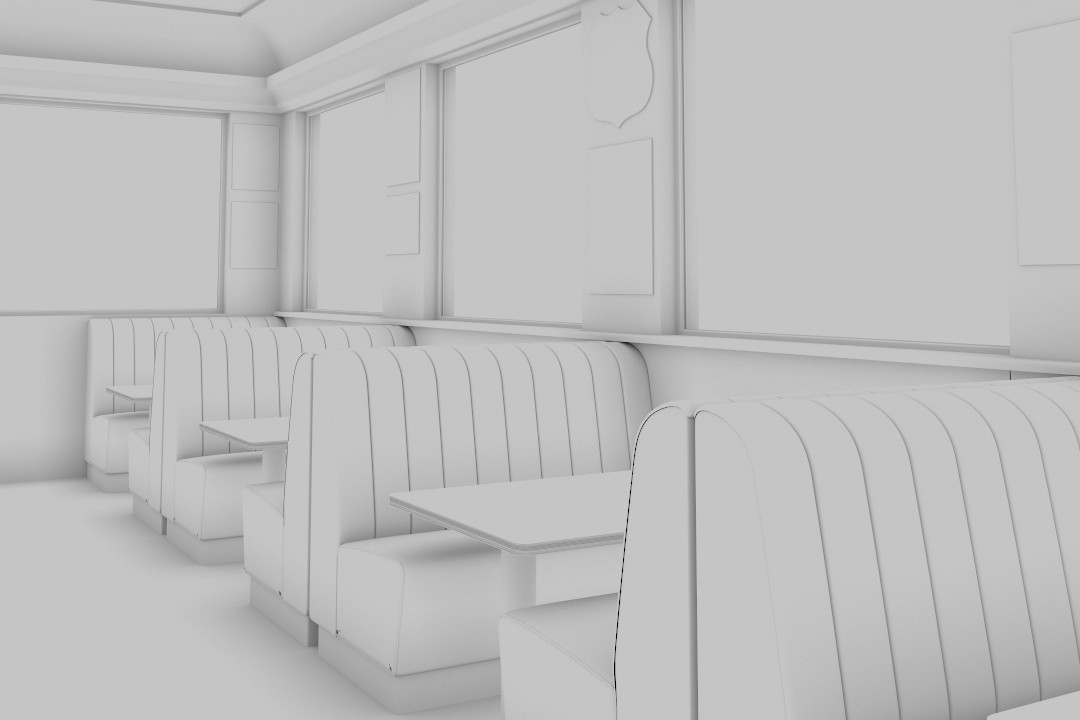
Below is the ambient occlusion render which is layered over the top of the original render, in Photoshop, set to multiply.
Ok thats enough of the examples here is how you do it
Ambient Occlusion Tutorial
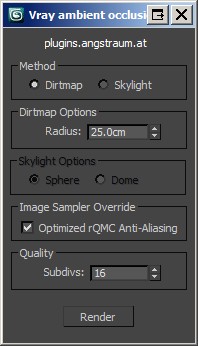
There are two ways I know of to render an ambient occlusion pass. The first and easiest is using a FREE 3DSMax script called VRay ambient occlusion 2.0.0. They advertise it as a 1-click ambient occlusion solution for Vray, but there are couple of things you should set to get the best from this plug-in.
VRay ambient occlusion 2.0.0.
With VRay ambient occlusion 2.0.0 you need to turn off the exposure setting in your Camera settings and uncheck use map in environment parameters and set the colour to pure white. It is not a big deal if you don’t turn of the exposure setting as you can adjust the levels in Photoshop later.


Once these settings are changed you can startup VRay ambient occlusion plug-in and the following will pop up. The only setting you need to change is the radius option, I tend to start at 25cm and increase it if necessary. We are just trying to show up the corners within the scene, if this number is too big the shading will make a gradient all the way across things like the walls. All you need to do now is click Render, because this type of render doesn’t use lighting, reflections or transparency it will render very quickly.
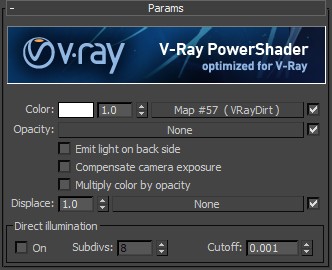
Ambient Occlusion with Vray Dirtmap
The second way to render an ambient occlusion pass is to use a VrayLightMtl material along with VrayDirt. In the material browser select a new material slot and click Standard then choose VrayLightMtl.
In the color slot place a VrayDirt diffuser and change the radius, in the same way you would in VRay ambient occlusion 2.0.0., and make sure the occluded color is black 0 and the unoccluded color is white 255.

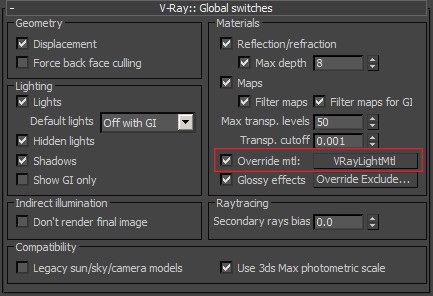
Now open up the Render Setup (F10) and under the V-ray Global switches check the box next to Override mtl and drag and drop the VRayLightMtl into the box next to it. Then just change the Camera Exposure and the environment the same as before and render as normal.
Ambient Occlusion to check normals
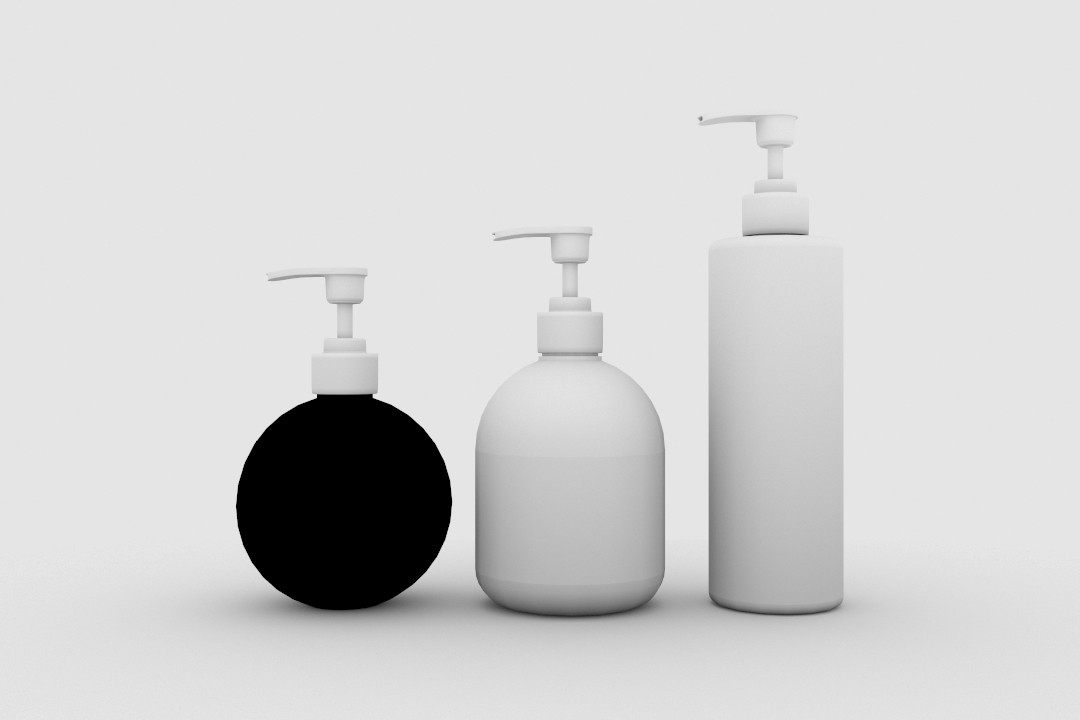
Apart from adding shading to renders you can use ambient occlusion to check the normals in a scene. As you can see from the renders below the fist is how the render should look and the second is what happens when the normals are the wrong way around.
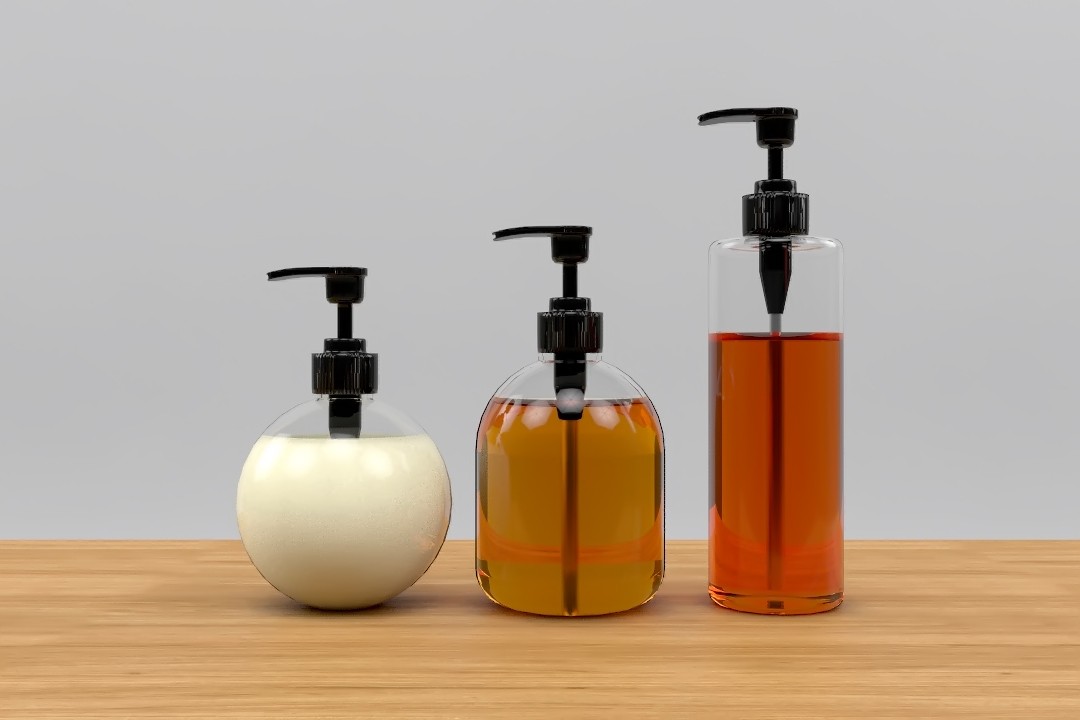

As you can see in the second render the outside of the bottle on the left is doing weird thing. Its is sort of reflecting instead of being transparent, the same is happening for the liquid of the middle bottle.
By running an ambient occlusion pass you can see that the bottle on the left is showing up black, which tells us that the normals need to be flipped by adding a Normal Modifier to the bottle.
Applying Ambient Occlusion pass in Photoshop
To add the ambient occlusion pass to the render, open the render in Photoshop and place the pass in a layer above it and set it to multiply. Add a Levels Adjustment layer above the ambient pass and whilst holding down the Alt key click between the two layers to link the Levels to the pass. Adjust the levels as below, bring the white point down to the beginning of the histogram and the black point up. Adjust the opacity of the pass layer until you are happy with the effect, normally between 20% and 40%.